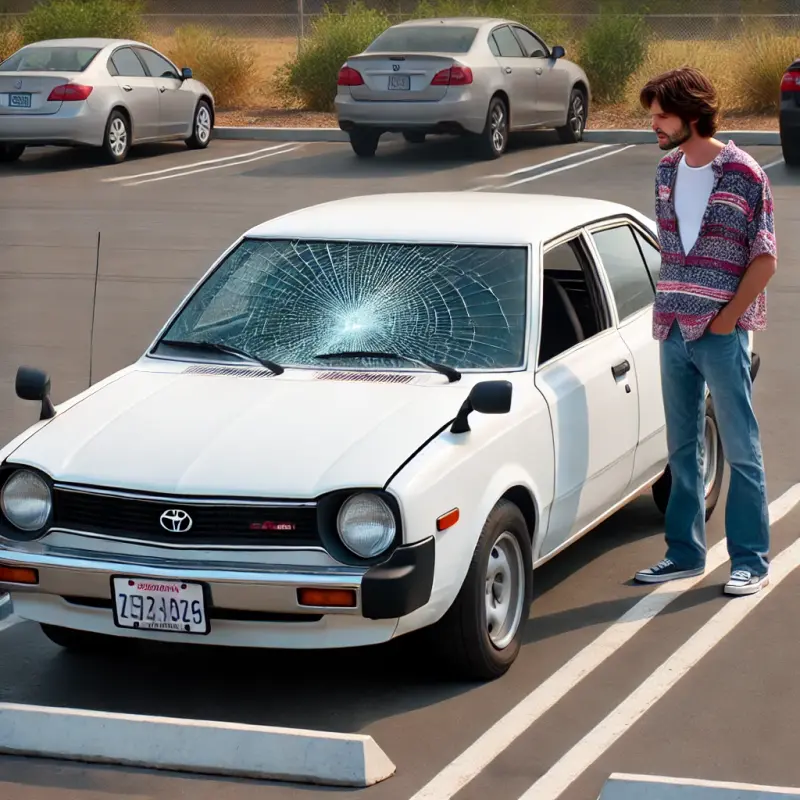
Windshield leaks rarely announce themselves at a convenient time. They show up with the first cold rain after a replacement, or on a humid afternoon when you finally blast the AC, and a faint whistle turns into a wet passenger floorboard. I’ve spent years around glass bays and mobile service vans in and around Columbia, and the patterns are remarkably consistent: when leaks happen, it’s usually not “bad glass,” it’s a lapse in prep, materials, or patience. The goal is simple, a Columbia Windshield that sits square, bonds tight, and stays dry through summer storms and winter temperature swings.
This guide distills the practical steps and judgment calls that keep water, air, and noise where they belong, outside the cabin. It draws on what seasoned technicians at shops like Columbia Auto Glass know by heart, plus the homeowner perspective of people who just want their car back without babysitting towels on the dash. If you’re shopping for a Columbia Auto Glass quote or evaluating whether to repair or replace, the details below will help you ask sharper questions and spot quality in the work.
Why leaks happen in the first place
A windshield is not just a pane of glass. It’s a structural component, a safety barrier, and a weather seal that ties into a messy interface of paint, trim, clips, sensor housings, and metal. Leaks originate from a handful of culprits that show up again and again:
- Poor surface prep on the pinchweld or glass, often leaving dust, older urethane, or oil that weakens adhesion. Wrong urethane or primer for the car’s materials or the day’s temperature and humidity. Rushed moldings, clips, and cowl installation, leaving gaps or channeling water into the bead. ADAS camera brackets or rain sensor areas not seated flush, allowing capillary paths for water. Body corrosion or previous collision repairs that hide uneven metal beneath the glass.
That list looks simple. In practice, each point is a chain of small decisions. Good techs are stubborn about the prep, and they check their work like someone who has had to pull too many windshields back out.
Prepping a Columbia windshield opening the right way
Clean, stable surfaces make or break the seal. The pinchweld, the name for the metal lip the glass bonds to, needs to be free of old urethane contamination and loose paint. You don’t grind it to shiny metal unless there is rust. You trim the old urethane to a uniform height and profile, typically about 1 to 2 millimeters, creating a fresh bonding surface that the new bead ties into chemically.
I’ve watched techs fight leaks for hours after skipping a simple wipe-down. The rule is to treat the pinchweld like a surgical site. Blow out the channel. Use the correct cleaner, not improvised solvents that can leave a film. If the shop mentions using a “no-touch car wash” as a pre-cleaner, make sure they still degrease the bonding area, since those washes can leave surfactants.
On the glass side, the frit band, that black ceramic border, needs a compatible primer for the urethane chosen. Most urethanes are sold as systems. Mixing brands or skipping the primer because “the frit looks clean” is an invitation for a dry spot that peels during a heat cycle. On cooler days in Columbia, especially during shoulder seasons, primers need the full flash time. If the bottle calls for 10 minutes, give it 10. Two minutes short to save time is a false economy.
Rust is a special case. Columbia’s climate throws humidity, pollen, and periodic road salts at daily drivers. If the pinchweld shows rust, even a thumb-nail sized patch, address it before the install. Neutralize and prime with an approved system. Pushing glass over active rust means the urethane will eventually let go, and the leak you save today waits for you after the first cold snap.
Choosing the right urethane for Columbia conditions
Not all urethanes cure the same way. The product that works at 80 degrees with humidity rolling in from Lake Murray is not the one you want before sunrise in January. The term safe drive-away time matters here. That’s the window at which the adhesive has enough strength for the vehicle to be driven without compromising crash performance. It’s influenced by bead size, temperature, humidity, and the urethane’s chemistry.
For leak prevention, two factors dominate: viscosity and compatibility. A higher viscosity bead resists slumping on hot days and maintains the intended height to contact both the glass and body. Too thin, and the bead sags, leaving low spots. Too thick, and you can trap voids if you rush the set.
Quality shops in the Auto Glass Columbia market stock at least two urethane types to cover seasons. If you’re getting a Columbia Auto Glass quote in summer, ask what they use to avoid slump in a parked car that bakes. If it’s winter, confirm they’re setting realistic safe drive-away times based on the morning temperature. A proper answer isn’t just a number, it’s a range with conditions, such as two to four hours at 70 degrees and 50 percent humidity.
The invisible geometry of a leak-free bead
If you ask a veteran installer what their urethane bead looks like, they’ll tell you before you look. It’s continuous, consistent, and deliberately tall at critical points. The tip cut matters. A V-notch cut at the right angle helps lay a triangular bead that wets out on both sides when compressed. The height must exceed the gap so it can compress slightly, ensuring contact. Beads that are flush with the pinchweld before the glass goes in can leave pockets.
Corners are where leaks begin. The bead should sweep continuously through each radius without thin spots or end joins. At splice points, overlap with pressure to avoid air pockets. If the vehicle has alignment blocks or setting pads, the bead must be positioned so the glass edge lands directly into the urethane, not beside it or overhanging the inner lip. Small misalignments, even a couple of millimeters, can divert water pathways under the molding.
For vehicles with ADAS cameras or rain sensors mounted at the top center, lay an extra attention zone there. The bracket and sensor housing can create channels. Adding a small reinforcement or ensuring a slightly taller bead in that region helps prevent capillary creep during heavy rain.
Moldings and clips decide the aftermath
I have seen immaculate bonding work undermined by sloppy cosmetic fittings. Moldings are not just decoration. They direct water away from the bead and, in some designs, cover channels that would otherwise scoop wind and moisture at highway speed.
Reusing moldings is a common request to save cost. Sometimes it is fine. But if a molding has warped, lost its tension, or its micro-clips are fatigued, you risk a flutter that pumps water under the cover. Similarly, cowl panels with broken tabs can pool water at the lower corners, exactly where the bead turns up the A-pillars. If you’re comparing quotes, ask whether new moldings or clips are included. A lower Columbia Auto Glass quote that reuses brittle plastic can become the most expensive option after a leak chase.
On vehicles with extruded rubber channels, seating is everything. Work the length with patient, even pressure, not by punching the last inches into place. A channel that buckles can lift overnight and create a path you won’t notice until the first downpour.
Dealing with Columbia’s climate variables
Our area loads a windshield with thermal swings and storms. Afternoon heat can drive cabin temperatures 30 to 50 degrees above ambient if the car sits in the sun. Evening thunderstorms add sudden cooling and sheets of water. Winter mornings can see freeze-thaw on the glass before work. Each condition stresses a new bond.
A few habits help the cure settle without drama:
- Park under shade for the first 24 hours when possible, so the bead warms and cures without slumping, and the glass avoids extreme temperature changes that create differential expansion. Crack the windows a finger-width to reduce internal pressure changes when doors close, especially on SUVs with tight door seals that can puff air against the setting bead. Avoid power washing or touchless car washes for at least 48 hours. A hose test is useful for diagnostics, but high-pressure jets at angles can push water under moldings and temporarily mislead you into thinking the bead leaks.
Technicians should always check weather when scheduling mobile installs. If a storm is rolling in and you lack a tent or garage, reschedule. The job you protect today saves a comeback tomorrow.
The hose test that actually tells you something
I’ve stood outside vehicles while an apprentice power-sprayed a windshield and then shouted that everything was dry. Five minutes later, the floor mat was squishy. The test isn’t about brute force, it’s about simulating rain.
A proper hose test uses a gentle, steady sheet of water, not a fierce stream. Start low on the glass and move upward, letting water run naturally over trim and down into the cowl. Give it time. Many leaks show after a minute or two, not immediately. Inside, station a second person with a flashlight. Pull the lower trim panel if accessible, or at least feel along the A-pillar interior trim edge. Touch for cold spots that suggest moisture accumulation.
If you suspect but cannot see a leak, blue shop towels tucked along the edge can telegraph wicking lines. Another trick is a non-staining leak-trace dye with UV, but use it cautiously and only with materials that won’t hold the color.
ADAS, sensors, and how electronics complicate sealing
Modern Columbia Windshield replacements usually involve an Advanced Driver Assistance System camera at the top of the glass. The mounting bracket must be bonded flat and true. A tilt or twist, even visibly minor, can open a fine path for water while also misaligning the camera.
The rain sensor gel pad matters too. If it’s wrinkled, contaminated, or not seated, water can become trapped against the glass and run laterally into trim. Always replace a deformed pad, don’t try to massage it back to life. For mirror-mounted camera harnesses, ensure the grommet is fully seated. I’ve seen a beautifully sealed glass leak because water snuck through a loose wire grommet and traveled under the headliner.
Recalibration is not just a safety step. If a camera mount is off because of uneven bead height or bracket inconsistency, calibration may fail, and that hints at a potential sealing inconsistency. A shop that handles both the glass and the calibration in-house has an incentive to get the geometry right the first time. Columbia Auto Glass operations that sub out calibration need tight coordination and quality checks to avoid surprises.
When to repair, when to replace
Customers often ask if a leak means the windshield must come out again. Not always. If the bead is intact and the leak originates from a missed molding or a cowl clip that drains water directly onto a seam, a targeted fix can work. Silicone is not the solution on the bonding plane. It can be a temporary patch on external trim gaps, but it should never touch the urethane interface.
If the leak emerges from a consistent point and shows up during both static rain and car wash conditions, the probability is a bond issue. Coming from the top corners after highway driving only? That leans toward molding aerodynamics. From the lower corners after parking on an incline? Suspect cowl drainage and pinchweld pooling. Pattern recognition matters.
When an installer suggests a full pull and reset, ask how they will change the variables this time: surface prep, urethane type, bead profile, moldings, or scheduling. Doing the same thing again and hoping is not a plan.
Common Columbia-specific pitfalls I see
Pollen season is a silent threat. Fine yellow dust coats everything, including the pinchweld during mobile installs in driveways. It looks harmless, and you can wipe it off a panel, but it embeds in adhesives and primers. If an installer is working outside in peak pollen, the cleaning regimen must be obsessive. Some mobile teams in Auto Glass Columbia carry pop-up canopies and sidewalls to tame the airflow around the opening. Those teams see fewer comebacks.
Summer heat in parking lots makes technicians rush the set to avoid hot glass handling. Good practice is to cool the vehicle interior ahead of time, open doors, and stage tools to minimize glass-in-hand time. The bead still needs its profile. A hurried lay that thins at the corners invites a leak when an afternoon storm hits.
Rainy day installs under small tents have their own risk. Drips from tent seams can splash the bonding area. I’ve watched a tech stop mid-prime to wipe a drop that fell from a tent strut. If you see a dangling tent line over the opening, reposition it or wait out the squall. Water in the wrong place at the wrong time gets trapped forever.
Vetting a shop without being a nuisance
You don’t need to micromanage a technician to ensure quality. A few targeted questions as you seek a Columbia Auto Glass quote help separate true pros from seat-of-the-pants operators.
- What urethane system do you use in summer versus winter, and what’s the safe drive-away time for my vehicle? Do you include new moldings and clips if needed, or will you inspect and advise before reusing them? How do you handle rust or prior paint damage on the pinchweld if you discover it? If my car has ADAS, do you calibrate in-house after installation, and do you verify camera bracket alignment? What is your leak policy? If a water test reveals an issue, how soon can you correct it, and what changes will you make on the rework?
These aren’t trick questions. The right shop will answer plainly. Some will even show you the sealant they use, explain the primer, and walk you through the safe drive-away time given the day’s weather.
What a technician’s setup says about the outcome
Over time, windshield replacement columbia you can tell a lot before the glass comes out of the crate. Organized tool trays show up in leak-free installs. Tip cutters that aren’t chewed up. Clean, labeled primer pens with dates. Gloves, lint-free wipes, and replacement clips ready, not a scramble back to the van mid-job. And, importantly, a tech who doesn’t mind a few minutes of silence. Rushing invites missed steps. Quiet attention is how a bead gets laid clean, the corners are filled, and the molding seats without gaps.
If you’re observing, notice whether the tech test fits the dry glass before priming. Good pros do. They use setting blocks or suction cups to check alignment, ensure the dashboard cameras will sit right, and confirm the moldings will meet. That test fit is where many alignment issues are solved before adhesive is ever opened.
Aftercare that actually matters
Customers often get a sheet of instructions. Some are useful, some are boilerplate. The ones that matter for leak prevention are simple.
- Leave the retention tape as placed by the installer for 24 hours, longer if humidity is high, so the molding stays seated while the adhesive skin strengthens. Avoid slamming doors for the first day. The pressure pulses can push air against the setting bead, especially on tightly sealed modern cabins. Hand wash around the edges gently if you need to clean the car. Skip automated washes for a couple of days. If you spot a drip or hear wind noise, call the shop quickly. Early intervention is easier, and some issues can be solved without pulling the glass.
You’re not babying the car for a week. You’re just giving the chemistry time to reach a stable state and the geometry time to stay put.
Troubleshooting: reading the symptoms
Leak diagnostics can be surprisingly intuitive once you correlate symptoms with paths.
- Drips during a steady rain while parked, especially from the A-pillar trim: likely a bond or corner gap. Look for steady weeping, not just intermittent spots. Wet floor after driving in heavy rain but dry when parked: aerodynamic water ingress via molding flutter or cowl splash. Watch for water trails near the corner trims. Fogging around the top center on humid mornings: potential rain sensor pad or mirror grommet issue, rather than bead failure. Musty smell with no obvious drips: slow capillary leak that wicks into headliner or insulation. Blue towels along edges after a hose test help locate this.
If you go back to the installer, share the pattern. A good shop doesn’t take it personally. They use that information to narrow the rework.
Insurance and the real cost of doing it right
Insurance glass claims can dull nuance. You may be guided to a network provider, or you might have freedom to select any shop in the Auto Glass Columbia market. Either way, remember that parts and labor lines hide decisions about moldings, clip replacements, and rust prep. A quote that itemizes these considerations, even if slightly higher, usually costs less in time and frustration.
If you need an out-of-pocket Columbia Auto Glass quote, ask for two versions: one that reuses moldings if they pass inspection, and one that includes new moldings and clips. The delta gives you a sense of where the trade-off really lies. Most customers choose the safer path once they see the numbers are often modest compared to a rework.
A quick anecdote from the field
A customer brought in a mid-size SUV that had a windshield replaced in a big-box lot. Complaints were light wind noise and a damp passenger mat after storms. The urethane looked decent at first glance. The culprit ended up being a cowl panel with two missing clips and a warped edge. During highway driving, air pressure lifted the panel slightly, scooping water that then cascaded directly onto the lower right corner of the bead. Under static hose testing, nothing. Under a fan with water introduced at the cowl, everything. Two new clips and a reshaped panel edge, plus a small bead reinforcement at the corner, and the problem disappeared. The original installer had done respectable adhesive work but lost the plot on the plastic.
That case taught a newer tech two lessons. First, test conditions matter. Second, the parts around the glass are part of the seal.
What to expect from a top-tier installation in Columbia
When a shop with strong standards replaces your windshield, the experience has a steady rhythm. They verify parts and sensors, protect the interior, and stage a clean workspace. The old glass comes out without tearing up the paint. The pinchweld is trimmed, cleaned, and, if needed, treated for rust with the right primer. The glass is primed per spec with full flash time. The urethane bead is laid in one continuous pass with consistent height, corners filled with care. The set is controlled and aligned to factory points. Moldings and cowls go back with fresh clips where necessary, and everything sits flush.
They water-test, not just a wipe-and-go. They review safe drive-away time based on the actual weather. If calibration is required, they complete it and provide results. You drive off with confidence, not crossed fingers.
Leak-free glass is not luck. It is choices stacked in your favor, from materials to technique to patience. In a place like Columbia where weather swings and road life test every seal, that stack matters.
If you’re weighing options, talk to a local specialist who can explain their process without hiding behind jargon. Whether you land at Columbia Auto Glass or another reputable shop, insist on the details that keep your cabin dry, your sensors honest, and your windshield doing its quiet, essential work, day after day.